My Ad Hoc Social Media Platform - Part 2 : What I did and how you can too!
This is a basic recollection and review of how I was able to use Slink to create an ad hoc social media platform hosted from an old 1L PC in my basement.
*Note: This is going to be structured somewhat as a guide and could be used as one, but I am also an idiot and almost certainly do not adhere to any best practices for networking, security, or any other subjects I touch on.
What I will be using:
Step 1: Domain
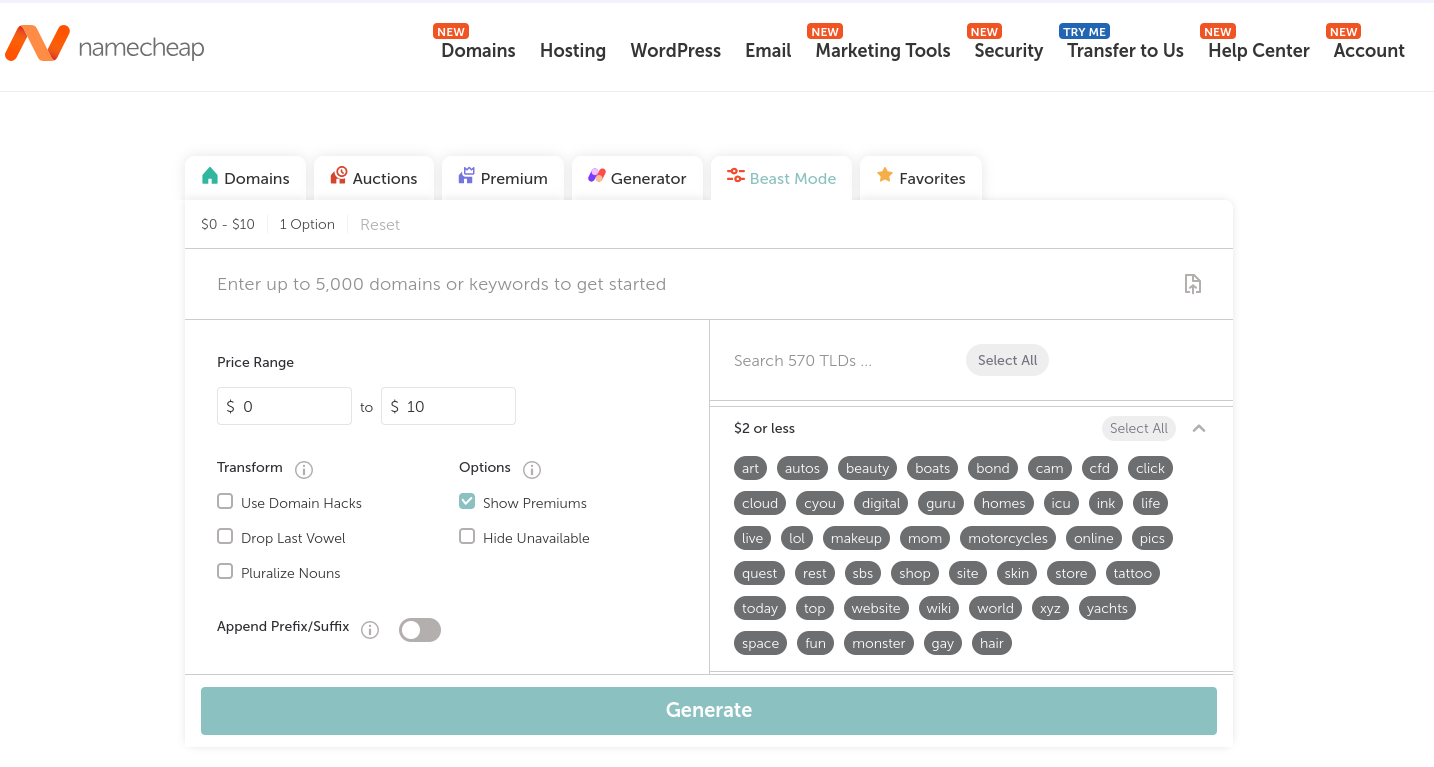
The first thing we will want to do is get our domain set up to give users a cleaner/nicer looking way to reach our app. I already had a domain through Namecheap, pooploser.net, so I am just going to use that but you can find tons of different domains for extremely cheap prices (around $2 per year).
Once we have a domain we will now need somewhere to point it to. You could use your home internet IP address for this but that is typically not recommended. Your internet provider will likely change you IP address randomly which will break the routing. So instead, lets use a VPS. A VPS (Virtual Private Server) is just a rented server (or part of a server) that is hosted by a company somewhere else in the world and, most importantly, usually will come with a static IP address.
Step 2: VPS
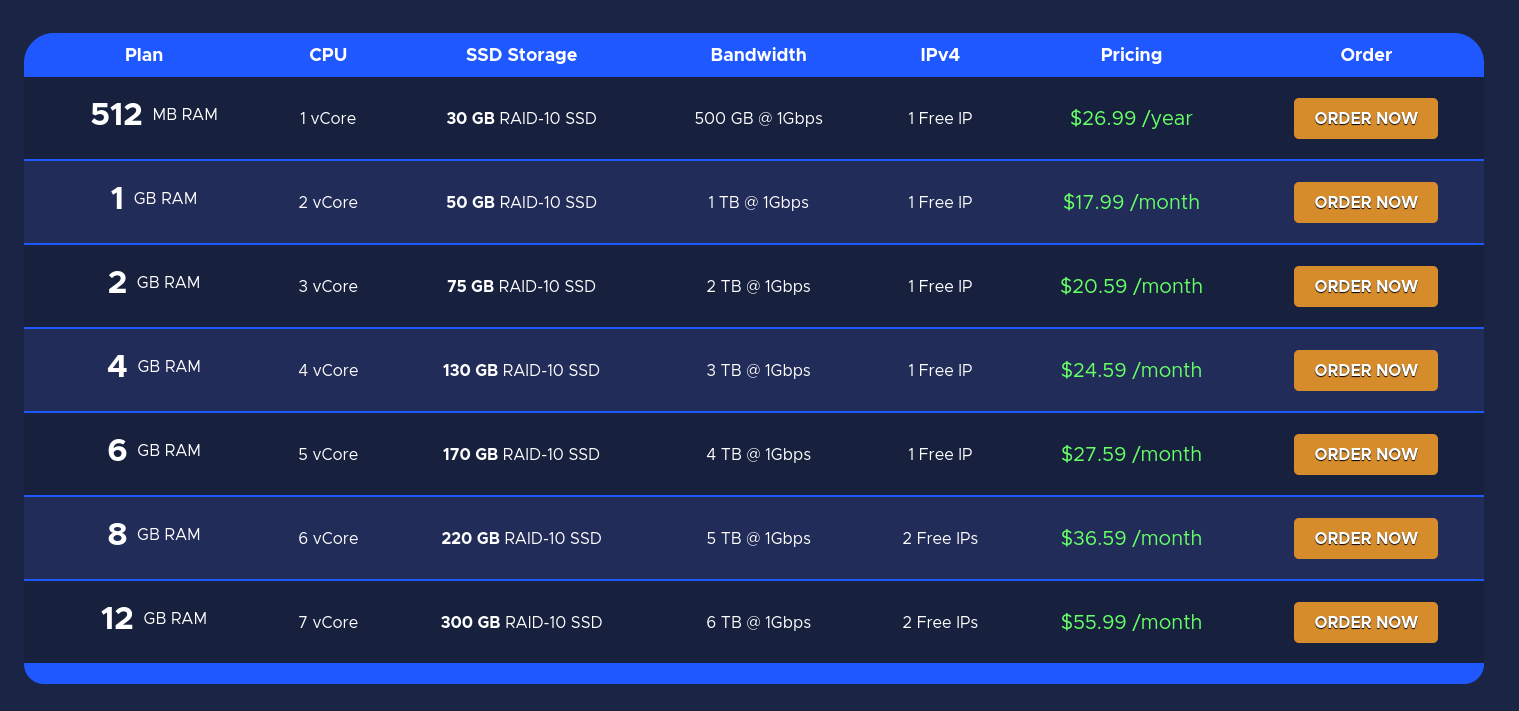
For the VPS host I went with RackNerd. I did this purely because I was able to find a good deal through an affiliate link from Pangolin (https://docs.pangolin.net/self-host/choosing-a-vps). Unfortunately, prices have been going crazy lately so it may be a little bit harder to find a good deal. The good news is that since this VPS will really only be used for routing traffic, we do not need very high specs.
Now that we just need to get our domain pointing to the new IP address we just got. This will be done with DNS.
Step 3: DNS
Since we now have a static IP address, we have a reliable place we can point our domain to. We just need to add a few A record entries to the Advanced DNS section of our domain management in Namecheap, with the value being set to the IP of our VPS.

Now anytime someone goes to our domain they are automatically routed to our VPS. This is great, but that doesn't really do much since the server has no idea what to do with this traffic and just gives the user an error.

We will eventually be setting up Caddy to handle the routing of this traffic, but first lets set up what Caddy will be directing the traffic to.
Step 4: Host Device and App Setup
I am choosing to use Linux Mint for my host OS on my mini desktop that will be running Slink. I like Linux Mint just because I am familiar with it, it doesn't use up too many resources, and it is based on Ubuntu which means most guides online work with it. There are probably better distros out there for all of this, but I like what I like.
This will assume you already have Linux installed and updated.
This whole thing will be set up using Docker and Docker compose.
Docker allows us to run prepackaged programs within their own mini environment called containers. Docker Compose lets us set up those containers using a config file.
We will get these installed using the following commands:
Add Docker's official GPG key:
sudo apt update
sudo apt install ca-certificates curl
sudo install -m 0755 -d /etc/apt/keyrings
sudo curl -fsSL https://download.docker.com/linux/ubuntu/gpg -o /etc/apt/keyrings/docker.asc
sudo chmod a+r /etc/apt/keyrings/docker.asc
Add the repository to Apt sources:
sudo tee /etc/apt/sources.list.d/docker.sources <<EOF
Types: deb
URIs: https://download.docker.com/linux/ubuntu
Suites: $(. /etc/os-release && echo "${UBUNTU_CODENAME:-$VERSION_CODENAME}")
Components: stable
Architectures: $(dpkg --print-architecture)
Signed-By: /etc/apt/keyrings/docker.asc
EOF
sudo apt update
sudo apt install docker-ce docker-ce-cli containerd.io docker-buildx-plugin docker-compose-plugin
Now that we have Docker installed I like to install Portainer to help me easily see and manage Docker containers in a webGUI.
docker volume create portainer_data
docker run -d -p 8000:8000 -p 9443:9443 --name portainer --restart=always -v /var/run/docker.sock:/var/run/docker.sock -v portainer_data:/data portainer/portainer-ce:lts
We are finally ready to start setting up our Slink app. First thing I will do is use the terminal I still have open with superuser permissions to create a folder for the app to hold everything in.
mkdir /mnt/slink/
Then I like to give full permissions to this location to all accounts using the following:
chmod 777 -R /mnt/slink
Now we will want to create folders in this directory for Slink use. I will name them data and images to match the preset values in the docker compose file (we will get to that in a sec).
I then run the permissions command again just for fun.
chmod 777 -R /mnt/slink
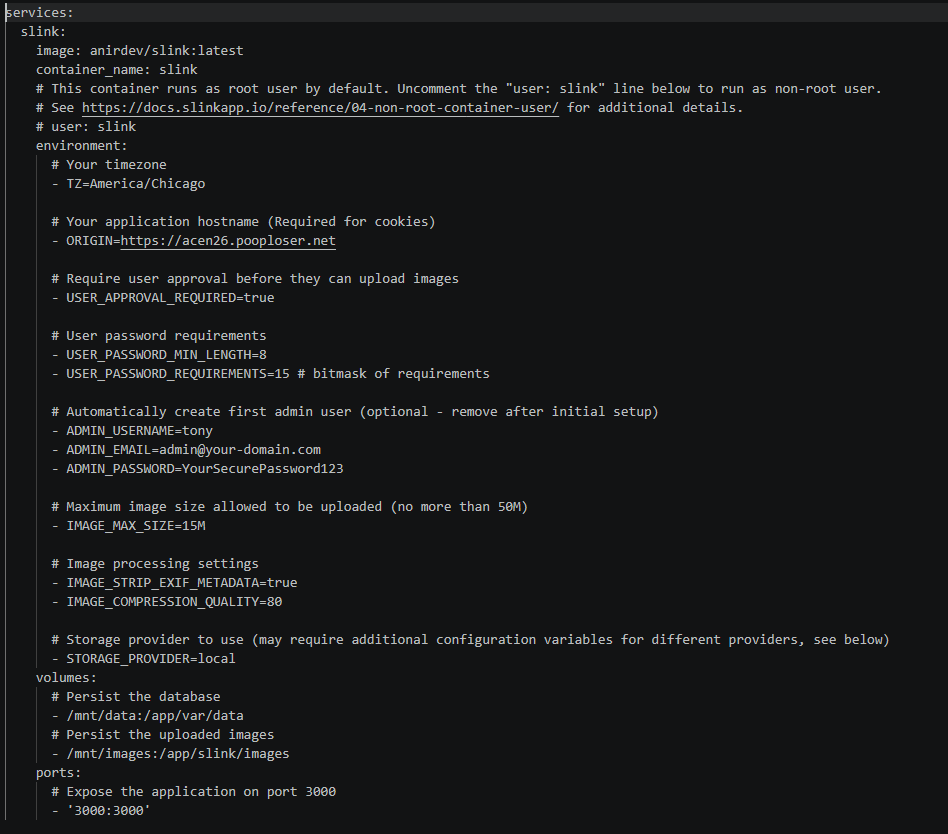
Within the /mnt/slink location I will now make a new blank file and name it docker-compose.yml. I will then copy and paste the default content from Slink's documentation (https://docs.slinkapp.io/installation/01-docker-compose/)
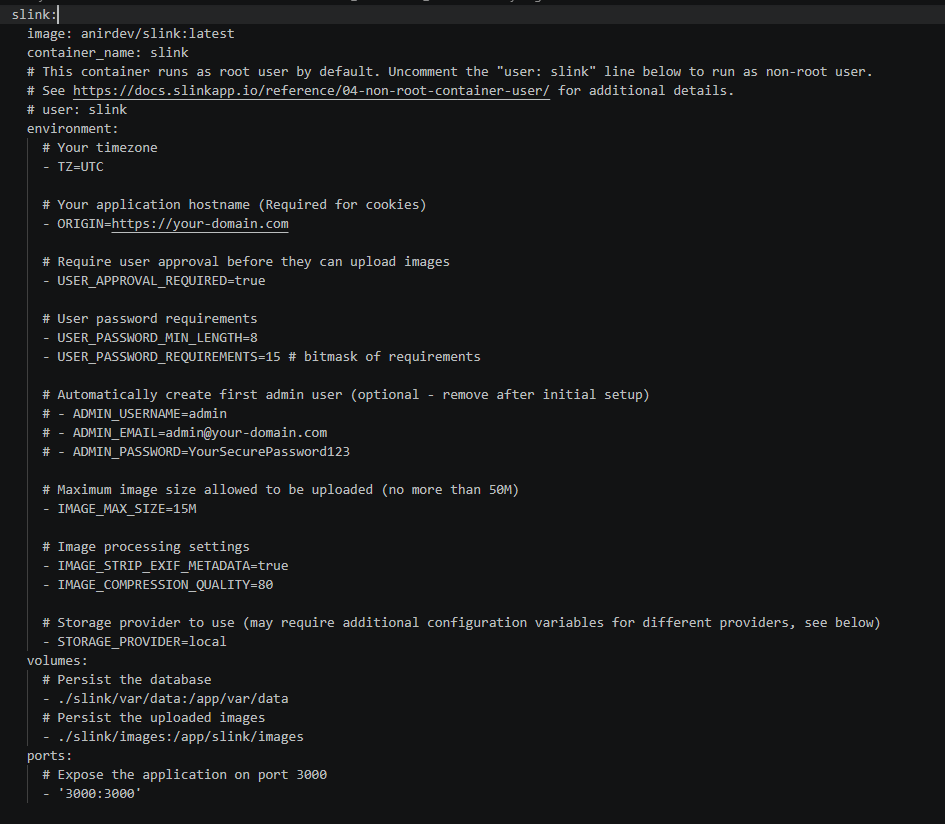
We will need to make some changes in here to make it actually work.
TZ=UTC I will change to TZ=America/Chicago
ORIGIN=https://your-domain.com I will change to ORIGIN=https://acen26.pooploser.net
./slink/var/data:/app/var/data will change to /mnt/data:/app/var/data
./slink/images:/app/slink/images will change to /mnt/images:/app/slink/images
I will also uncomment the first user section to create the admin account
So our final docker-compose file will look like this:
Back on the terminal we will navigate to the directory holding the docker compose file.
cd /mnt/slink
Then run the command to have docker create the container.
docker compose up
We can now go into Portainer and see the newly created container there. I will also change the restart setting to "unless stopped" to make sure that if the computer reboots the container will restart itself.
If you try going to localhost:3000 to get into the app now you will probably run into issues signing in. I'm pretty sure this is a result of us setting the origin variable in the yml file resulting in only allowing authentication through that domain. We wont need to worry about that though we will just need to wait until the rest of the networking is set up before we can log in.
The important thing we did here though is get that port 3000 set up so we now have something to direct traffic to for it to get to the app.
From here we could finish up the set up using our home public IP but that brings with it the same issues we needed the VPS for. So how do we get traffic from our VPS to our home network in a secure and stable way? That is where Netbird comes in.
- Netbird Setup:
Netbird will act as our VPN, allowing a direct connection from our VPS to our local host machine. We will need to create a free Netbird account at https://netbird.io/ and then install the endpoint client on both our VPS and host by running this command on each:
curl -fsSL https://pkgs.netbird.io/install.sh | sh
then start it with:
netbird up
This will bring up a link that you will need to open in your browser to log in and provision the device in Netbird.
Now we should see both show up in our Netbird dashboard with their own Netbird specific IP addresses.
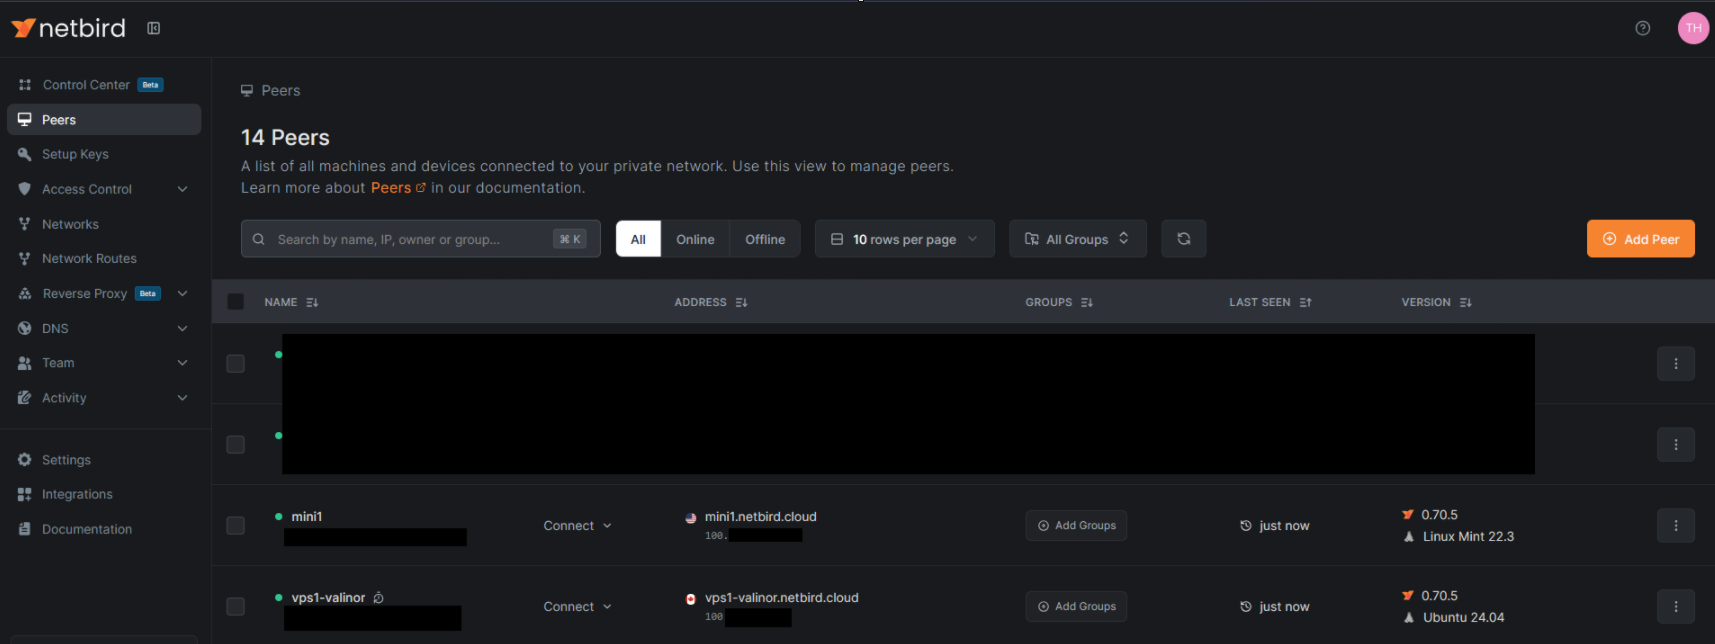
I will be using 100.x.y.z as a stand in for the Netbird IP address of our host device.
Now we have a way for our two devices to talk to each other but we still need to direct traffic though that path. This is where our Caddy config will come in.
- Caddy Setup:
Finally we have the two ends complete and now just need to finish tying them together. We have traffic coming into the VPS specifically from acen26.pooploser.net and need that traffic directed to port 3000 on our host.
To do this with Caddy all we need to do is install Caddy with:
sudo apt install caddy
And then open the Caddy config file located at /etc/caddy/Caddyfile as a superuser but running the following in terminal:
cd /etc/caddy
sudo nano Caddyfile
Now we just add the following:
acen26.pooploser.net{
redir 100.x.y.z:3000
}
You will need to restart the Caddy service or reboot the VPS for this to take effect.
Done!
Finally, now if we try going to acen26.pooploser.net from a device, the request goes to a DNS server, the server sends you to our VPS public IP, our VPS immediately sends your request to Caddy where it adds port 3000 to your request and sends you to the host over our Netbird network, and finally it reaches our host at port 3000 and Slink!